


Hello all! I am Anna from True Lovelies. Do you love plants? Do you long for the beauty and comfort plants can bring to your home? Have you ever seen a gorgeous plant and imagined exactly where it would go in your life? But wait! You remember that cactus a friend gave you that somehow ended up drying out, or that air plant that turned brown, or the millionth adorable succulent you sadly had to throw away. If this sounds familiar, welcome! We are the same! But, fear no more! True Lovelies has just the solution to achieve that dream garden with no worries. I am so excited to share with you how to crochet your very own zero maintenance dangling curly plant! You never have to water it and it will be a forever plant friend by your side!

Supplies
-Yarn: (Use any weight or color to make your plant unique!)
I used worsted weight Red Heart Super Saver in Spring Green (Curlies) and Coffee (soil)
-5.5 mm hook
-Tapestry needle
-Scissors
-3 inch clay pot
-Polyfill or yarn scraps for stuffing
-Stitch marker or scrap of yarn
Key
-Magic Ring
-Ch (Chain)
-sc (single crochet)
-Increase
-Decrease
-Slip Stitch
Notes
Switch up the type and color of yarn to make a completely unique Dangling Curly Plant. The soil pattern is worked in a continuous circle, without joining rounds. You can use a stitch marker or a piece of different colored yarn to keep your place! The yarn for the soil uses two strands of yarn together for fullness. I find it helpful to use two different skeins of soil yarm to avoid tangling!

Soil
Create Magic RIng
Round 1: 6 sc in magic ring
Round 2: 2 sc in every stitch until the end of the round (12 stitches)
Round 3: 1sc, 2sc in next stitch, repeat until the end of the round (18 stitches)
Round 4: 1 sc, 1 sc, 2sc in the next stitch, repeat until the end of the round (24 stitches)
Round 5-9: 1 sc in each stitch around (24 stitches)
Round 10: 1 sc in next four stitches, decrease. Repeat until the end of the round (20 stitches)
Round 11: 1 sc in each stitch until the end of the round (20 stitches)
Slip stitch in the next stitch. Fasten off and leave a long tail for sewing. Wait to stuff until the curlies are attached.

Curly
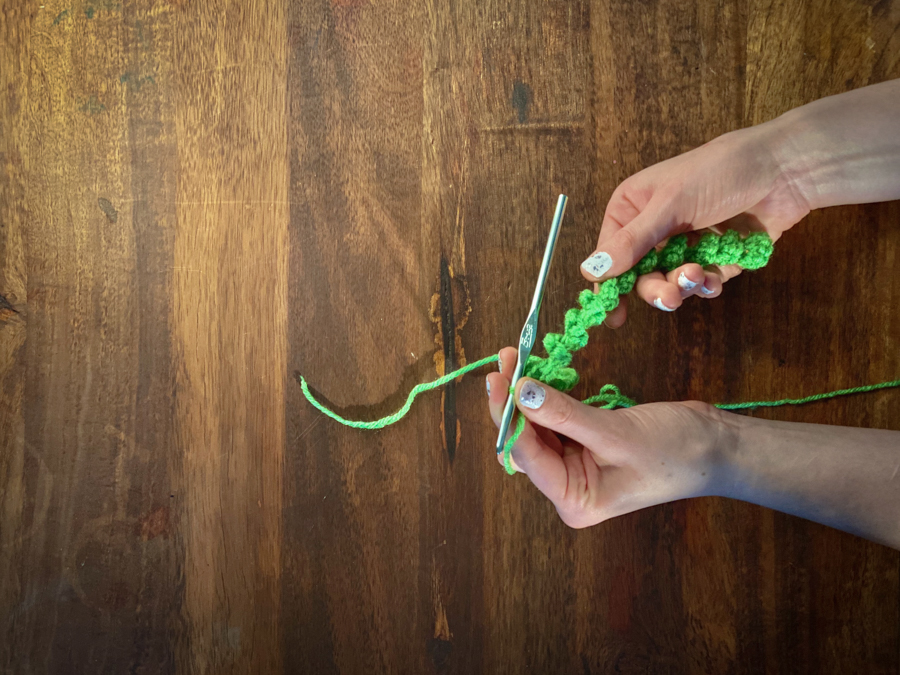
Chain number for desired length.
Example:
Ch 35 (leave about a 4 inch tail for attaching to the soil)
-3 sc in the 2nd chain from hook
-3 sc in each chain until the end of the chain. The curl will start to form, you may need to use your fingers to twist the curly into shape.
-Fasten off with about a 4 inch tail for attaching to the soil. The curly will have two tails to tie to the soil.
Repeat pattern for curly with different lengths until you have your desired amount. Make sure to do a few extra long ones for that dangling look!

Using a tapestry needle feed both ends of the curly through the inside of the soil and secure with a knot inside.

(The tails become part of your stuffing!) It is very helpful to turn the soil inside out to make the knots.

Repeat this process until all of your curlies are attached. Stuff the soil yarn with yarn scraps or polyfill, fasten off and tightly sew closed using a tapestry needle.

Place in your clay pot and display! Have fun with your plant! You can further personalize it by painting your pot!

I hope you had an absolute blast creating your plant friend! I would love to see your completed projects! You can tag #truelovelies in your posts and follow more of my work on Instagram . You can also purchase crochet plants in all shapes and sizes as well as Macrame, accessories, patterns and more on my Etsy shop .


